
DZ Coverage Basics
A sensible way to defend, from beer league to NHL

Originally published February 2025
Earlier this week I received the following question from a Twitter follower:
Hey Jack!
Just saw your tweet regarding VAN’s zone defense. Wondering what you believe to be the best dzone coverage for a team to play.
I’m getting in to coaching next season and been debating with myself what works best for Jr. B kids.
Thanks!
Yesterday, I was on the ice with an adult recreational team looking to prepare for an upcoming tournament in another province.
Is there a simple, easy to implement defensive zone coverage scheme that could be effective in both of these use cases?
I believe so.
Many NHL teams use a Hybrid DZC, featuring a mix of man-on-man and zone principles.
The Hybrid is more fluid than a pure Zone DZC (good news for skilled players looking to make reads rather than always going to the same spot) and less demanding than a pure Man-on-Man DZC (good news for players who are not necessarily in tip-top physical condition, or have trouble turning/stopping to one side).
The Hybrid is also less complicated than it sounds.
Here’s how it works.
Step 1: Return to DZ
Return to DZ refers to the critical transitional period between an entry against and a DZ coverage scenario. It’s the least structured phase of DZ play, as a team could be defending an even-men situation (1v1, 2v2, 3v3, etc.), an odd-men rush, or a dump-in.
Every play is a little bit different, but the players’ roles stay relatively consistent.
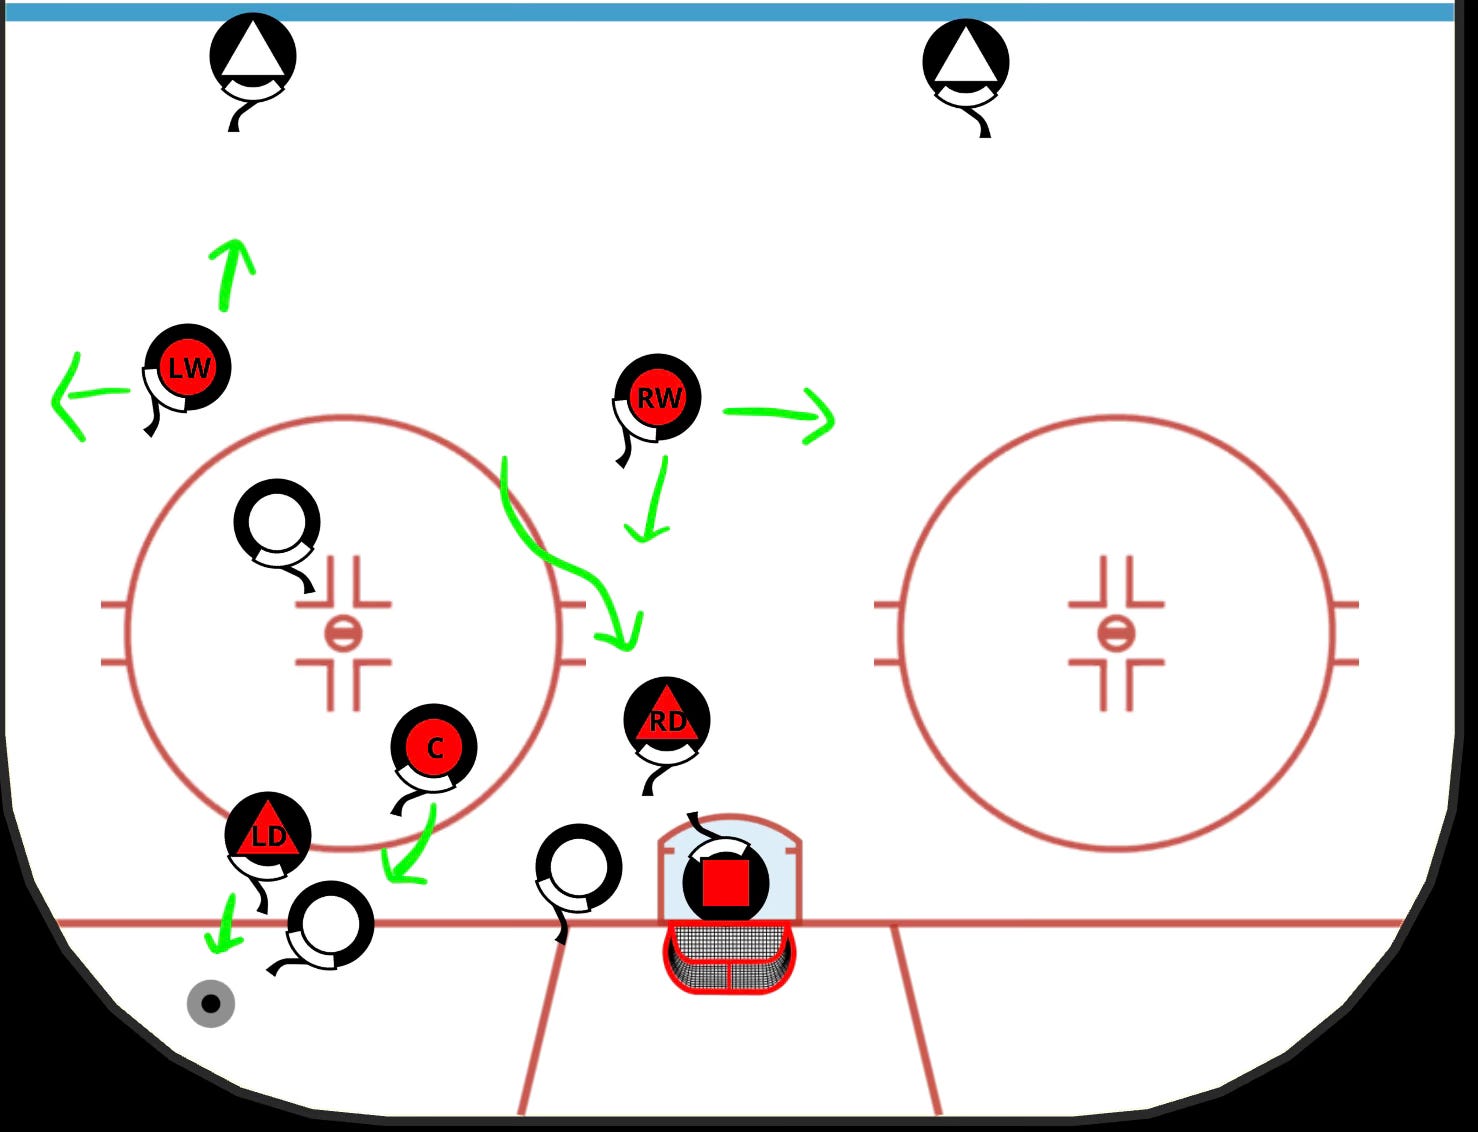
Strong-Side D (LD)
Force opposing puck carrier wide on entry
Force dump-in if possible
First on puck in corner battle
Weak-Side D (RD)
Recover through the middle and stop at the front of the net
Be aware of plays into the slot
Be ready to skate under the goal line if LD wins the puck and needs an out
First F back (C)
Sprint below the goal line as the second quick player, if LD is able to stop the play
If not, stay above the goal line and scan for slot threats
Second F back (LW)
Take away the low-to-high pass to the point, which is the easiest play to make for LD’s check
If the puck does go up, get into the shooting lane
Third F back (RW)
Recover through the middle and stop in the high slot
Scan for backside threats, especially if the opposing weak-side D is active offensively
Be ready to sprint to the opposite half-wall if LD’s check rims the puck to the weak side
Step 2: Corner Stall-Out
The defensive team shifts the odds in its favor by pushing the puck carrier into the wall down low and getting into a Five Tight (5v3 in one quadrant).
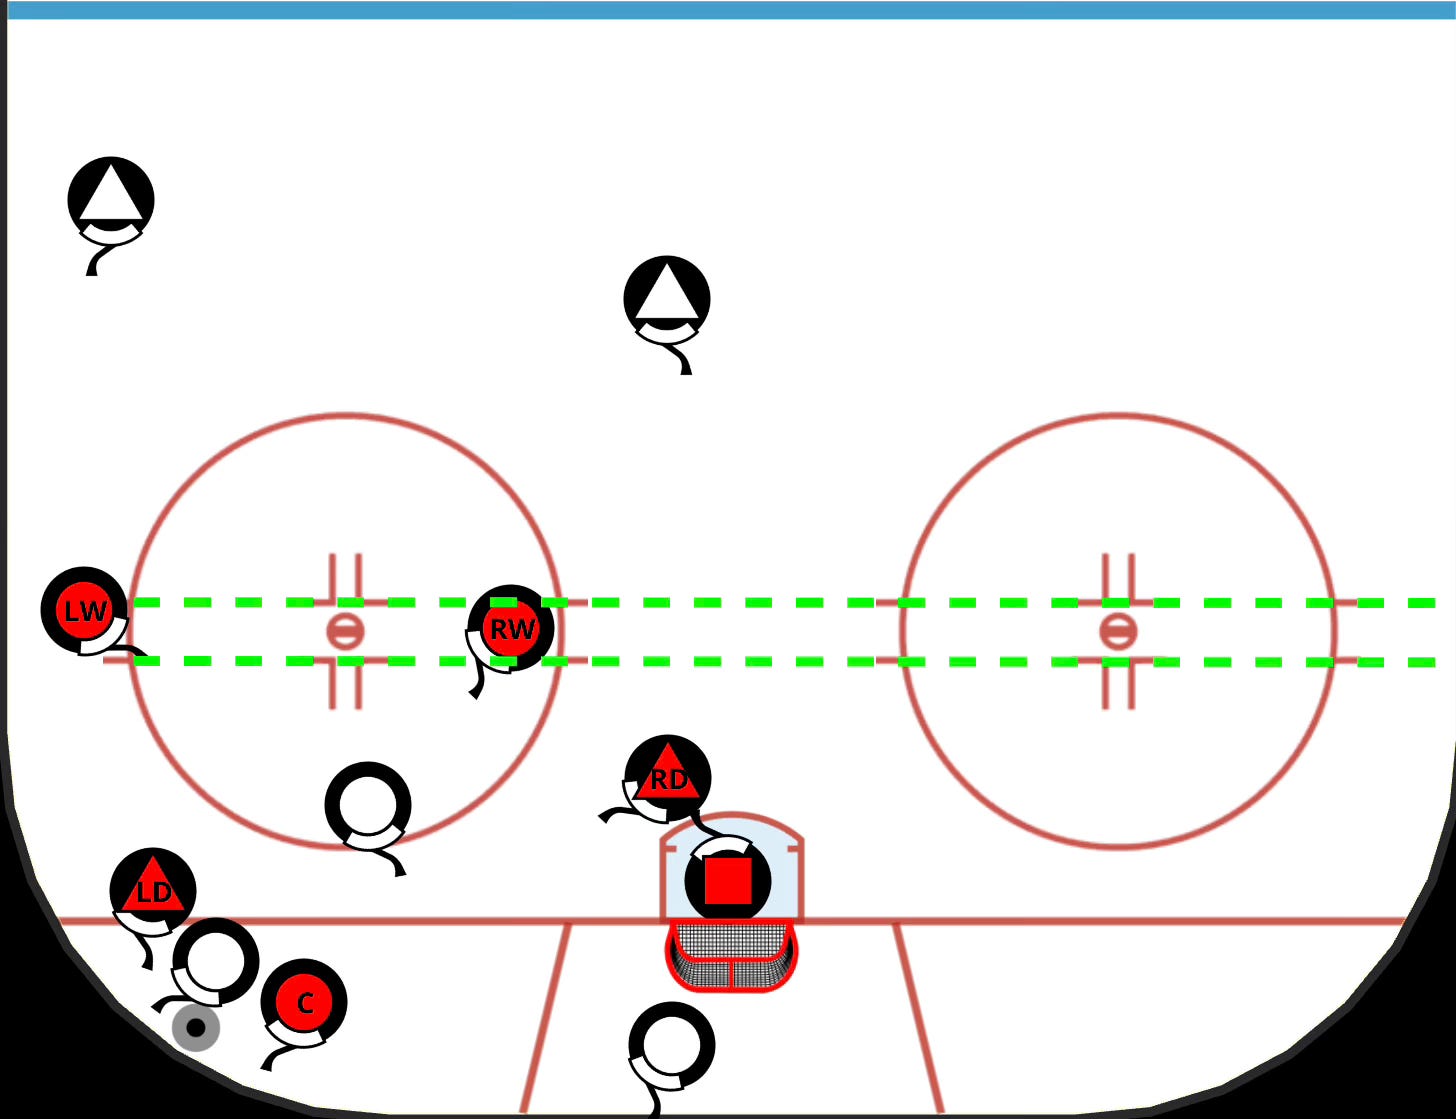
LD & C battle for the puck against one or two opposing Fs
RD protects netfront or approaches the pile if the third opposing F joins in
LW and RW stay on the Rail (imaginary lines through the hashmarks) and read the play
Step 3: Low Cycle
Keep reading with a 7-day free trial
Subscribe to Hockey Tactics Newsletter to keep reading this post and get 7 days of free access to the full post archives.